Every product is independently reviewed and selected by our editors. If you buy something through our links, we may earn an affiliate commission at no extra cost to you.
When your Lennox thermostat fails, your entire home’s comfort system can come to a halt. But not every problem requires a professional technician.
We’ll show you how to quickly diagnose and fix common issues, from a blank screen to unresponsive buttons, so you can regain control of your comfort.
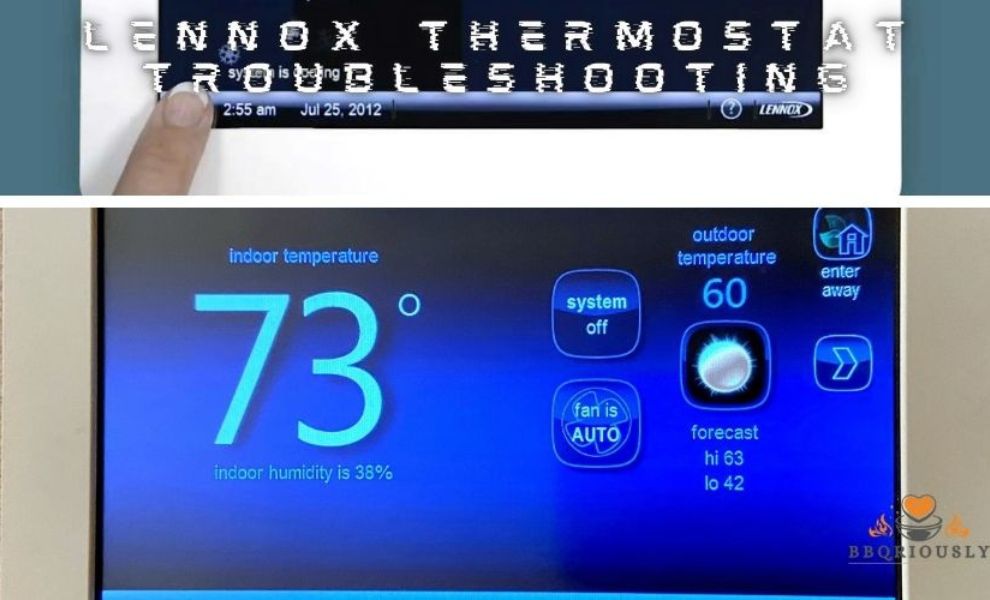
Lennox Thermostat Troubleshooting: Quick Fixes for Common Issues
Stay with us to explore these quick troubleshooting steps to save time and money.
Necessary Things to Ensure Wow Result
Common Thermostat Issues
Thermostats control the comfort of your home. Lennox thermostats are reliable but can face issues over time. Common thermostat problems affect your heating and cooling system’s efficiency. Knowing these issues helps you fix them quickly and avoid bigger repairs.
No Power Or Display
A thermostat with no power or display means it cannot control your system. This issue often happens suddenly and stops your HVAC from working.
Common causes include:
- Dead batteries:Many Lennox thermostats use batteries that need regular replacement.
- Tripped circuit breaker:A breaker might have flipped, cutting power to the thermostat.
- Loose wiring:Wires may disconnect inside the thermostat or at the HVAC control board.
- Blown fuse:The system’s fuse could be damaged, stopping electricity flow.
Steps to troubleshoot no power or display:
- Check and replace batteries with fresh ones.
- Inspect your home’s circuit breaker panel for tripped breakers.
- Turn off power, remove the thermostat cover, and check wiring for looseness or damage.
- Look for a blown fuse near your HVAC system and replace it if necessary.
- Reset the thermostat by turning off power for 30 seconds and turning it back on.
| Cause | Action |
| Dead Batteries | Replace batteries with new, correct type |
| Tripped Breaker | Reset breaker switch in electrical panel |
| Loose Wiring | Secure wires under thermostat and HVAC board |
| Blown Fuse | Replace fuse with same rating |
Always be cautious when handling electrical parts. Call a professional if unsure.
Inaccurate Temperature Readings
Your thermostat must read the room temperature correctly to control heating and cooling. Inaccurate readings cause discomfort and wasted energy.
Common reasons for wrong temperature include:
- Improper thermostat placement:Near heat sources, direct sunlight, or drafty areas.
- Dirty sensors:Dust on sensors can affect temperature detection.
- Old thermostat:Aging components lose accuracy over time.
- Calibration errors:The thermostat may need recalibration to match true temperature.
Signs of inaccurate readings:
- Room feels hotter or colder than thermostat shows.
- HVAC cycles too often or not enough.
- Temperature changes when moving thermostat to a new spot.
Troubleshooting tips:
- Move the thermostat away from direct sunlight, vents, or appliances.
- Clean the thermostat gently with a soft brush or cloth.
- Check the thermostat’s manual for calibration instructions.
- Consider replacing an old thermostat for better accuracy.
Unresponsive Controls
Unresponsive controls mean the thermostat does not react when you press buttons or change settings. This stops you from adjusting home temperature.
Possible causes:
- Software glitches:Firmware errors can freeze the thermostat.
- Dirty or stuck buttons:Physical buttons may get stuck or dirty.
- Touchscreen issues:For touchscreen models, damaged or dirty screens affect response.
- Power supply problems:Low power can cause slow or no response.
Troubleshooting steps:
- Restart the thermostat by turning off power for 30 seconds.
- Clean buttons or touchscreen gently with a soft cloth.
- Check batteries and replace if low.
- Reset thermostat to factory settings as a last resort.
If controls remain unresponsive, the thermostat might need professional repair or replacement.
Frequent System Cycling
Frequent cycling means the heating or cooling system turns on and off too often. This wastes energy and wears out equipment faster.
Common reasons for frequent cycling include:
- Incorrect thermostat settings:Too narrow temperature range causes rapid cycling.
- Dirty air filters:Reduced airflow forces the system to work harder and cycle more.
- Oversized HVAC system:A system too large for your home heats or cools quickly and shuts off.
- Faulty thermostat sensor:Bad sensors cause incorrect temperature signals.
Effects of frequent cycling:
- Higher energy bills.
- Increased wear on HVAC components.
- Uneven room temperature.
How to fix frequent cycling:
- Set the thermostat to a wider temperature range (increase the “deadband”).
- Replace or clean air filters regularly.
- Have an HVAC technician check system size and performance.
- Test and replace faulty thermostat sensors if needed.
Basic Troubleshooting Steps
Basic troubleshooting steps help identify common issues quickly. These steps save time and prevent unnecessary repairs. Most Lennox thermostat problems come from power, settings, wiring, or battery issues. Following these easy steps helps restore comfort fast. Below are key actions to try first before calling a technician.
Checking Power Sources
Power problems are the most frequent cause of thermostat failure. First, ensure the thermostat has a steady power supply. A thermostat without power cannot control heating or cooling.
- Check the circuit breaker:Find your home’s breaker panel. Look for a tripped breaker labeled HVAC or thermostat. Reset it by switching off and on.
- Inspect the fuse:Some HVAC systems use a fuse near the furnace or air handler. A blown fuse stops power to the thermostat.
- Examine the power switch:Make sure the HVAC system’s power switch is on. It looks like a light switch near the unit.
Use this table to track the power checks:
| Power Check | Action | Result |
| Circuit Breaker | Reset breaker if tripped | Restores power if breaker was off |
| Fuse | Replace if blown | Allows current flow to thermostat |
| Power Switch | Turn switch on | Enables HVAC system operation |
Check these power sources carefully. A small issue here stops the thermostat from working.
Resetting The Thermostat
Resetting the thermostat can fix software glitches or frozen displays. Many Lennox thermostats have a reset button or menu option.
Try these reset steps:
- Locate the reset button or menu on the thermostat.
- Press and hold the button for 5 to 10 seconds.
- Wait for the screen to turn off and on again.
- Reprogram your settings if needed.
Some thermostats have a reset option under settings:
- Go to the main menu.
- Select “Reset” or “Factory Reset.”
- Confirm the reset action.
Resetting clears temporary errors. It does not erase all your saved schedules unless you choose factory reset. Use reset if the thermostat:
- Freezes or stops responding.
- Shows incorrect temperature.
- Fails to turn HVAC on or off.
Resetting often restores normal function quickly without extra tools.
Inspecting Wiring Connections
Loose or damaged wires cause many thermostat issues. Check wiring if power and reset do not fix the problem.
Steps to inspect wiring:
- Turn off power to HVAC system at the breaker panel.
- Remove the thermostat cover carefully.
- Look at each wire connection for looseness or corrosion.
- Make sure wires are connected to the correct terminals.
- Check for broken or frayed wires.
- Reattach any loose wires firmly.
Use this wiring guide for Lennox thermostats:
| Terminal | Wire Color | Function |
| R | Red | Power (24V) |
| W | White | Heating |
| Y | Yellow | Cooling |
| G | Green | Fan |
Be gentle with wires and terminals. Do not force connections. Tight and clean wiring ensures the thermostat communicates correctly with the HVAC system.
Replacing Batteries
Some Lennox thermostats use batteries to power the display or backup functions. Weak batteries cause the screen to dim or lose settings.
Follow these steps to replace batteries:
- Remove the thermostat from the wall mount gently.
- Open the battery compartment.
- Take out old batteries and check for corrosion.
- Insert fresh batteries, matching the correct polarity (+ and -).
- Close the compartment and reattach the thermostat.
- Check if the display lights up and the thermostat works normally.
Use alkaline batteries for longer life. Avoid mixing old and new batteries. Batteries usually need replacement every 1 to 2 years.
Signs you need new batteries:
- Thermostat display is blank or dim.
- Settings reset frequently.
- Heating or cooling cycles stop unexpectedly.
Changing batteries is a quick fix that restores power and saves calls to a technician.
Advanced Troubleshooting Tips
The Lennox thermostat is a smart device that controls your home’s heating and cooling. Troubleshooting basic problems like unresponsive screens or incorrect settings is easy. But some issues need advanced steps. These advanced troubleshooting tips help fix complex problems. They improve system performance and prevent future errors.
Firmware Updates
Firmware is the software inside your Lennox thermostat. It controls how the device works. Keeping firmware updated is crucial for smooth operation. New updates fix bugs, add features, and improve security.
Check for firmware updates regularly. Most Lennox thermostats notify you when an update is available. You can also check manually through the thermostat menu or the app.
- How to update firmware:
- Go to the thermostat’s settings menu
- Select “System Information” or “Software Update”
- Choose “Check for Updates”
- If an update is available, follow the on-screen instructions
Before starting, ensure your thermostat has a steady Wi-Fi connection. Interruptions during updates can cause issues. Updates may take several minutes. Avoid turning off the thermostat during this time.
| Firmware Version | Key Fixes | Release Date |
| 3.5.1 | Improved Wi-Fi stability, bug fixes for screen errors | March 2024 |
| 3.4.0 | Added voice control support, enhanced security | December 2023 |
Updating firmware can solve many issues quickly and keep your thermostat running well.
Calibrating Temperature Sensors
Temperature sensors help the thermostat measure room temperature accurately. Incorrect readings cause the system to heat or cool too much or too little. Calibration fixes sensor errors.
Here are steps to calibrate temperature sensors on a Lennox thermostat:
- Go to the thermostat’s settings menu
- Find the “Temperature Calibration” or “Sensor Calibration” option
- Compare the thermostat reading with a reliable thermometer in the room
- Adjust the thermostat reading up or down to match the thermometer
- Save the changes and monitor the temperature for accuracy
Calibration should be done when the room is at a stable temperature. Avoid doing this near windows, vents, or direct sunlight. These factors can cause wrong sensor readings.
Signs sensor calibration is needed:
- The room feels warmer or cooler than the thermostat shows
- Heating or cooling runs too long or stops too soon
- Temperature swings frequently without reason
Regular calibration keeps your HVAC system efficient and comfortable.
Diagnosing Hvac System Compatibility
Lennox thermostats work best with compatible HVAC systems. Compatibility issues cause errors like no heat, no cooling, or system cycling.
Check your HVAC system and thermostat compatibility before installation. Use the following guide:
| HVAC System Type | Compatible Lennox Thermostat Models | Notes |
| Single-Stage Furnace | iComfort S30, iComfort E30 | Works with standard heating and cooling |
| Two-Stage Furnace | iComfort S30 | Supports advanced staging and zoning |
| Heat Pump Systems | iComfort S30, iComfort E30 | Requires heat pump compatibility settings |
| Geothermal Systems | Check specific model compatibility | May need custom wiring |
Steps to diagnose compatibility problems:
- Verify wiring matches thermostat instructions
- Check system type in thermostat settings
- Look for error codes on the thermostat display
- Consult your HVAC technician if unsure
Using the right thermostat for your system avoids malfunctions and improves control.
Using Diagnostic Mode
Diagnostic mode helps identify hidden problems in Lennox thermostats and HVAC systems. It shows error codes and system status details.
To enter diagnostic mode:
- Press and hold the menu button on the thermostat
- Tap the settings icon
- Select “Diagnostics” or “System Test”
- Review the displayed codes and messages
Error codes explain specific issues, such as sensor faults or communication problems. You can look up codes in the thermostat manual or Lennox support site.
Common diagnostic codes include:
| Error Code | Meaning | Suggested Action |
| E01 | Temperature sensor error | Calibrate or replace sensor |
| E02 | Wi-Fi connection lost | Check network and reconnect |
| E03 | Communication failure with HVAC | Check wiring and system power |
Using diagnostic mode regularly helps catch problems early. It saves time and repair costs.
When To Call A Professional
Knowing when to call a professional for Lennox thermostat troubleshooting saves time and prevents damage. Some issues are simple and can be fixed by homeowners. Others require expert skills and tools. Understanding the signs helps you decide the best action. Calling a professional ensures your system works safely and efficiently.
Persistent Malfunctions
Some thermostat problems keep coming back despite attempts to fix them. These persistent malfunctions often indicate deeper issues. Troubleshooting simple problems like resetting or battery replacement may not solve them. Continuing malfunctions can cause discomfort and higher energy bills.
Signs of persistent malfunctions include:
- The thermostat does not respond to temperature changes.
- The display screen is blank or flickers frequently.
- The heating or cooling system turns on and off too often.
- Temperature readings are inaccurate or inconsistent.
Trying to fix these problems repeatedly wastes time. It can also lead to more damage. A professional technician has the tools and knowledge to diagnose the root cause quickly. They can repair or replace parts safely and correctly.
| Common Persistent Issues | Possible Causes | Professional Solutions |
| Thermostat unresponsive | Faulty internal components or wiring | Advanced diagnostics and repair |
| Inaccurate temperature readings | Sensor malfunction or placement issues | Sensor calibration or replacement |
| System short-cycling | Incorrect thermostat settings or wiring | System tuning and wiring check |
Complex Wiring Issues
Thermostats connect to your HVAC system through several wires. Handling wiring can be tricky for many homeowners. Mistakes during wiring work can cause short circuits, damage, or unsafe conditions. Complex wiring issues should be left to professionals.
Signs that wiring issues need expert help:
- Thermostat wires are frayed, broken, or burnt.
- New thermostat installation involves unfamiliar wiring colors.
- The system fails to power on after wiring changes.
- Confusion about which wire connects where.
Professional technicians understand wiring diagrams and Lennox system requirements. They ensure correct connections and test the system safely. Their work prevents electrical hazards and system failures.
Here is a simple wiring guide for common Lennox thermostat wires:
| Wire Color | Function | Notes |
| Red (R) | Power from transformer | Often has R, RH, or RC labels |
| White (W) | Heating control | Connects to heat relay |
| Yellow (Y) | Cooling control | Connects to compressor |
| Green (G) | Fan control | Controls indoor fan |
| Blue or Common (C) | Common return wire | Provides continuous power |
Always turn off power before touching thermostat wires. Call a professional if unsure about wiring steps.
System Compatibility Problems
Not all thermostats work with every HVAC system. Lennox offers many models, but system types vary. Compatibility problems cause poor performance or no operation. These issues need expert evaluation.
Compatibility problems occur when:
- Your thermostat does not support your heating or cooling system type.
- The thermostat lacks features required by your HVAC system.
- Smart thermostat settings conflict with system controls.
- The wiring terminals do not match between thermostat and system.
Professionals assess your current HVAC system and recommend suitable thermostats. They ensure proper setup and programming for optimal performance. Incorrect thermostat choice may damage system components or void warranties.
Common HVAC system types and thermostat compatibility:
| HVAC System Type | Recommended Thermostat Features | Notes |
| Single-stage heating/cooling | Basic programmable thermostat | Simple wiring, easy installation |
| Multi-stage HVAC | Multi-stage thermostat with multiple terminals | Supports advanced temperature control |
| Heat pump systems | Heat pump-compatible thermostat | Includes emergency heat settings |
| Zoned HVAC systems | Thermostat compatible with zone control | Manages multiple zones independently |
Consulting a professional avoids costly mistakes. Proper thermostat selection improves comfort and energy savings.
Maintenance Practices
Proper maintenance practices keep your Lennox thermostat working well. Regular care helps prevent common issues and extends the device’s life. Simple steps can avoid many problems that make your thermostat less accurate or responsive. Follow clear, easy routines to maintain your thermostat’s performance and comfort levels in your home.
Regular Cleaning
Dust and dirt build up on thermostat sensors and buttons over time. This can cause incorrect readings or make the screen hard to read. Clean your thermostat at least once a month for the best results. Use a soft, dry cloth to wipe the surface gently. Avoid harsh chemicals or water that can damage the device.
- Turn off the thermostat before cleaning.
- Use a microfiber cloth to remove dust.
- Clean around buttons and vents carefully.
- Do not spray cleaners directly on the thermostat.
For stubborn dirt, slightly dampen the cloth with water and wipe gently. Check the thermostat’s manual for any special cleaning instructions. Keeping the thermostat clean improves its sensor accuracy and extends its lifespan.
Seasonal Checks
Thermostats face different demands across seasons. Perform seasonal checks to ensure smooth operation year-round. Inspect the thermostat and heating or cooling system at the start of each season. This helps catch issues early before they affect comfort.
- Check the battery level and replace if low.
- Verify the thermostat settings match the season.
- Test the heating and cooling functions.
- Inspect wiring and connections for damage or corrosion.
- Clean or replace air filters in the HVAC system.
Use this simple checklist to guide your seasonal inspections:
| Task | Frequency | Purpose |
| Battery Check | Every 3 months | Prevent power failure |
| Settings Review | Start of each season | Ensure correct temperature control |
| Function Test | Seasonal | Confirm heating/cooling works |
| Wiring Inspection | Yearly | Detect wiring issues |
| Filter Cleaning | Monthly or as needed | Improve air flow and quality |
Software Maintenance
Many Lennox thermostats include software that controls settings and connectivity. Keeping this software updated fixes bugs and adds useful features. Check for updates regularly through the thermostat’s app or menu. Updates improve reliability and security.
Steps for software maintenance:
- Connect the thermostat to Wi-Fi.
- Open the Lennox app or thermostat menu.
- Look for software or firmware update options.
- Download and install any available updates.
- Restart the thermostat if needed.
Software updates can also improve energy-saving functions. Set automatic updates if your thermostat supports it. This ensures your device stays current without manual checks. Regular software care helps avoid performance issues and keeps your thermostat running smoothly.
Frequently Asked Questions
How Do I Reset My Lennox Thermostat?
To reset, press and hold the reset button for 5 seconds. If no button exists, turn off power for 1 minute. This clears errors and restores factory settings. Always check your model’s manual for specific reset steps to avoid damage.
Why Is My Lennox Thermostat Not Connecting To Wi-fi?
Check your Wi-Fi password and router signal strength. Restart the thermostat and router. Ensure your network supports 2. 4 GHz, as many Lennox models require it. Firmware updates may also fix connectivity issues.
How Can I Fix Inaccurate Temperature Readings?
Clean the thermostat sensor gently. Avoid placing the thermostat near heat sources or direct sunlight. Calibrate the thermostat if your model allows. Incorrect readings often result from environmental factors or sensor faults.
What Does The Error Code On My Lennox Thermostat Mean?
Refer to your thermostat’s user manual for specific error codes. Common codes indicate wiring issues, sensor failures, or communication errors. Identifying the code helps in troubleshooting or deciding when to call a professional.
Conclusion
Troubleshooting your Lennox thermostat can save time and money. Start with simple checks like power and settings. Small fixes often solve common issues quickly. Keep the user manual handy for easy reference. Regular maintenance helps your system run smoothly. If problems persist, contact a professional technician.
Staying proactive ensures comfort in your home all year. Remember, a working thermostat means better energy use and lower bills. Don’t ignore warning signs; act early to avoid bigger problems. Your comfort depends on a well-functioning thermostat.