Every product is independently reviewed and selected by our editors. If you buy something through our links, we may earn an affiliate commission at no extra cost to you.
A low flame is one of the most common—and most frustrating—grilling problems. But before you resign yourself to steamed hot dogs instead of sizzled steaks, take a breath. The good news is that fixing a low flame on your gas grill is often a simple, do-it-yourself task.
From fuel supply to clogged burners, we’re breaking down “Fixing Low Flame Problems Made Easy” with straightforward steps to restore your grill’s roaring power.
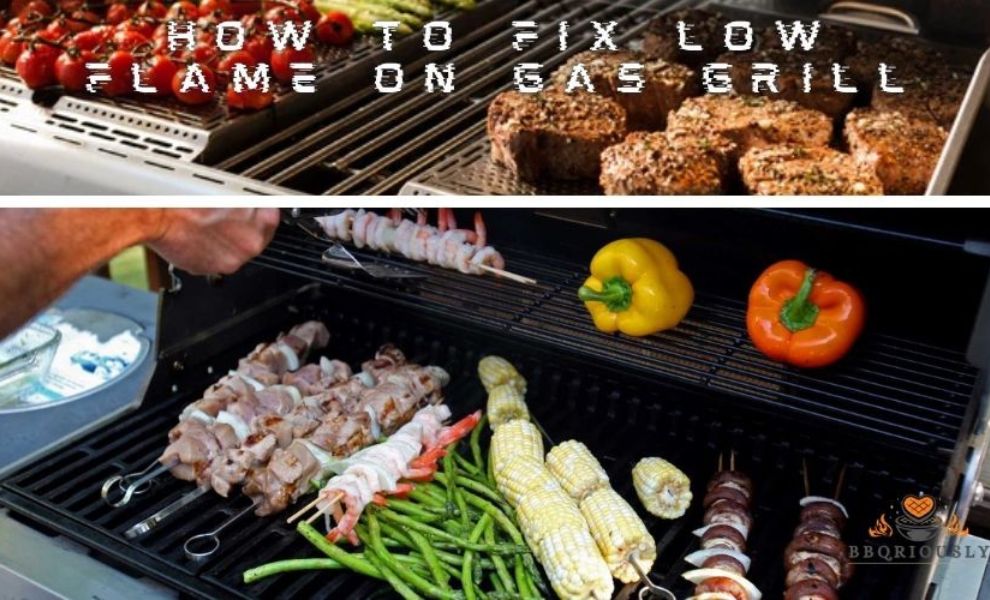
How to Fix Low Flame on Gas Grill: Quick & Easy Solutions
In this quick guide on how to fix low flame on a gas grill, you’ll learn simple steps to restore strong, even heat and get back to perfect grilling in no time.
Causes Of Low Flame
Low flame on a gas grill can ruin cooking plans and frustrate outdoor chefs. Understanding the causes of low flame helps fix the problem fast. Several factors affect flame strength, from blockages to gas flow issues.
Identifying the exact cause will restore your grill’s performance and ensure even heating. The main reasons include clogged burner ports, gas supply issues, regulator problems, and ignition system faults.
Clogged Burner Ports
Burner ports are small holes where gas escapes to ignite the flame. Over time, these ports collect dirt, grease, and food debris. This buildup blocks gas flow, causing a weak or uneven flame. Grill users often miss cleaning burner ports regularly.
Signs of clogged burner ports:
- Flame is patchy or low on one side of the grill
- Yellow or orange flames instead of blue
- Grill takes longer to heat up
Cleaning clogged ports is simple:
- Turn off and cool the grill completely.
- Remove burner tubes carefully.
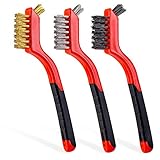
- Use a soft brush or pipe cleaner to clear each port.
- Flush with warm soapy water and dry thoroughly.
- Reinstall burners and test the flame.
Regular cleaning prevents blockages and keeps flames strong. Check burner ports every few uses, especially after heavy cooking sessions.
Gas Supply Issues
A steady gas supply is critical for a strong flame. Any problem with the gas source reduces flame size and heat output. Common gas supply issues include:
- Empty or low propane tank
- Loose or damaged gas hose
- Closed or partially closed gas valve
Inspect the gas tank gauge first. Replace or refill the tank if gas is low. Next, examine the hose for cracks, kinks, or leaks. Replace damaged hoses immediately to avoid safety risks.
Check the gas valve position. It should be fully open during grilling. A partially closed valve limits gas flow and weakens the flame.
| Gas Supply Problem | Effect on Flame | Fix |
| Low propane | Weak or no flame | Replace or refill tank |
| Damaged hose | Gas leaks, weak flame | Inspect and replace hose |
| Closed valve | No gas flow, no flame | Open valve fully |
Regularly check your gas connections and tank level before grilling.
Regulator Problems
The regulator controls gas pressure from the tank to the grill. A faulty regulator causes uneven or low flame. Regulators can become clogged, freeze, or fail over time.
Symptoms of regulator problems:
- Flame lights then goes out
- Flame is weak even with a full tank
- Hissing sounds or gas smell near the regulator
To test the regulator:
- Turn off the grill and gas tank.
- Disconnect the regulator from the tank.
- Reconnect it and slowly open the tank valve.
- Listen for hissing or gas leaks.
- Try lighting the grill.
Regulators are inexpensive and easy to replace. If problems persist, replace the regulator with one recommended by the grill manufacturer.
Ignition System Faults
The ignition system creates the spark that lights the gas. Faulty ignition parts cause weak or no flame. Common ignition faults include:
- Dead or weak battery in electronic igniters
- Dirty or corroded electrodes
- Loose wiring connections
- Broken igniter button or switch
To fix ignition faults:
- Replace the battery in the igniter (if applicable).
- Clean electrodes with a brush or cloth.
- Check and tighten any loose wires.
- Test the igniter button for proper function.
If the igniter still fails, use a manual lighter until replacement parts arrive. Proper ignition ensures reliable flame starts every time.
Tools And Materials Needed
Fixing a low flame on a gas grill requires the right tools and materials. Having these ready helps solve the problem faster and safer. This section covers essential items needed for cleaning, replacing parts, and protecting yourself during the repair.
Cleaning Supplies
Cleaning the gas grill is the first step to improve the flame. Grease, dirt, and debris often block the burners or gas flow. Use the right cleaning supplies to clear these blockages effectively.
- Wire brush: Scrapes off rust and stuck food from grill grates and burners.
- Pipe cleaners or thin wire: Clears clogged burner holes and gas ports.
- Dish soap and warm water: Removes grease and dirt from grill parts.
- Spray bottle: Holds soapy water for easy application.
- Soft cloth or sponge: Wipes surfaces clean without scratching.
- Compressed air canister: Blows out dust and small debris from hard-to-reach areas.


Follow these cleaning steps for better results:
- Remove grill grates and burner covers.
- Scrub all parts with a wire brush.
- Use pipe cleaners to clear burner holes.
- Wash parts with soapy water and rinse.
- Dry all parts completely before reassembling.
| Cleaning Tool | Purpose | Tip |
| Wire Brush | Remove rust and residue | Use stiff bristles for best cleaning |
| Pipe Cleaner | Unblock burner holes | Gently insert to avoid damage |
| Dish Soap & Water | Clean grease and dirt | Use warm water for better cleaning |
Replacement Parts
Some parts wear out or break, causing low flame issues. Keep common replacement parts handy. This saves time and restores grill performance quickly.
- Burners: Replace if rusted, cracked, or blocked beyond cleaning.
- Igniters: Fix spark problems that prevent proper lighting.
- Gas valves: Control gas flow; replace if leaking or stuck.
- Regulator: Maintains correct gas pressure for flame strength.
- Gas hose: Replace if cracked or damaged to avoid leaks.
- Control knobs: Replace if broken for better control.
Check your grill model for compatible parts. Use this table to identify common replacements:
| Part | Symptoms of Failure | Replacement Tip |
| Burner | Uneven or low flame, rust spots | Match size and style exactly |
| Igniter | No spark, difficulty lighting | Test spark before replacement |
| Gas Valve | Gas leaks, flame goes out | Use correct pressure rating |
Store parts in a dry, safe place. Replace only damaged or worn components to save money.
Safety Gear
Safety is critical when working with gas grills. Protect yourself from burns, gas leaks, and dirt during repairs. Use proper safety gear to reduce risks.
- Heat-resistant gloves: Protect hands from hot parts and flames.
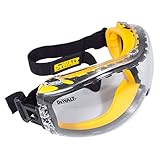
- Safety goggles: Shield eyes from debris and sparks.
- Face mask: Prevent inhaling dust, rust, or gas fumes.
- Long sleeves and pants: Cover skin to avoid burns and cuts.
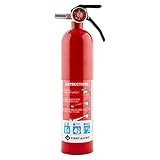
- Fire extinguisher: Keep nearby in case of accidental fire.
- Flashlight: Helps see clearly in low light or inside burners.

Follow these safety tips:
- Turn off the gas supply before starting repairs.
- Work in a well-ventilated area.
- Wear all protective gear throughout the process.
- Check for gas leaks after reassembly.
- Keep children and pets away from the work area.
Being careful and prepared prevents accidents and ensures a smooth repair.
Step-by-step Cleaning Process
Cleaning your gas grill is key to fixing a low flame. Dirt, grease, and debris block gas flow. This stops the flame from burning strong. Follow this step-by-step cleaning process to restore your grill’s power.
Each step helps clear the parts that affect flame size and heat. Keep tools nearby: a wrench, brush, and warm water. Safety is first, so take your time and work carefully.
Disconnecting The Gas Supply
Start by turning off the gas supply. This step is crucial to avoid leaks or accidents. Locate the gas valve on your propane tank or natural gas line. Turn it clockwise until tight.
- Remove the hose from the tank or gas source using a wrench.
- Check the hose for cracks or damage. Replace if needed.
- Keep the grill in a well-ventilated area while working.
Never try to clean the grill with the gas connected. Even a small spark can cause fire. After disconnecting, wait a few minutes to let any residual gas clear out. Use a soap and water solution to check for leaks. Brush off dirt near the connection points. This reduces the risk of blockages and improves gas flow.
Removing Burner Components
Next, remove the burners for deep cleaning. Burners are usually held by screws or clips. Use a screwdriver or wrench to loosen these carefully. Place screws in a small container to avoid losing them.
- Lift the grill grates to access burners.
- Unscrew or unclip the burners from their mounts.
- Gently pull burners out, avoiding damage to gas tubes.
Inspect burners for cracks or rust. Damaged burners reduce flame quality. Clean the burner surfaces with a soft brush. Avoid using sharp tools that can cause holes. Soak burners in warm, soapy water for 15-20 minutes to loosen grease. Rinse thoroughly and dry before moving on.
Clearing Blockages
Blockages in burners and gas tubes cause low flame. Use a thin wire or pipe cleaner to clear holes. Push the wire gently through each burner hole to remove debris. Avoid forcing the wire, which can enlarge holes or cause damage.
| Tool | Purpose | Tip |
| Thin Wire | Clear burner holes | Use gentle back-and-forth motion |
| Pipe Cleaner | Clean gas tubes | Replace if too stiff or dirty |
| Compressed Air | Blow out loose debris | Wear eye protection |
After clearing holes, use compressed air to blow out dust. Check gas tubes for spider webs or dirt. Clear these with a pipe cleaner. Blockages reduce gas flow and cause low flame. Cleaning these parts improves flame size and heat output.
Reassembling Parts
Put everything back carefully to keep the grill working well. Start by placing the burners back on their mounts. Align the gas tubes before tightening screws or clips. Make sure burners sit evenly without tilting.
- Secure screws or clips tightly, but avoid over-tightening.
- Replace grill grates on top of burners.
- Reconnect the gas hose to the tank or gas line.
- Test for leaks with soap and water solution on connections.
Turn on the gas slowly and light the grill. Watch the flame to see if it burns strong and even. If flame stays low, re-check for blockages or loose parts. Regular cleaning and careful reassembly keep your grill safe and efficient. A clean grill gives better heat and longer life.
Checking Gas Supply And Pressure
This section guides through simple checks and fixes to restore your grill’s flame strength. Focus areas include the gas tank and hose, the regulator, and gas flow adjustments. Follow these steps carefully to enjoy a healthy, strong flame every time you grill.
Inspecting Gas Tank And Hose
Start by examining the gas tank. Check the tank’s fuel level to confirm it is not empty or near empty. A low gas level can cause a weak flame.
- Look for dents, rust, or damage on the tank body.
- Ensure the tank valve is fully open before lighting the grill.
- Replace or refill the tank if fuel is low.
Next, inspect the hose that connects the tank to the grill. Damage or blockages here can reduce gas flow and flame size.
- Check for cracks, holes, or wear along the hose length.
- Feel for soft spots or leaks by gently pressing on the hose.
- Use a soap and water solution to test for leaks; bubbles will form if gas escapes.
| Component | What to Check | Action If Problem Found |
| Gas Tank | Fuel level, physical damage | Refill or replace tank |
| Hose | Cracks, holes, leaks | Replace hose |
Regular inspection of the tank and hose helps prevent low flame and ensures safety.
Testing Regulator Function
The regulator controls gas pressure from the tank to the grill. A faulty regulator often causes a weak or uneven flame. Testing its function helps identify problems early.
Steps to test the regulator:
- Turn off the gas at the tank.
- Disconnect the regulator from the gas tank.
- Inspect the regulator for cracks, dirt, or damage.
- Reconnect the regulator securely to the tank.
- Slowly open the gas valve and listen for hissing sounds.
Signs of a bad regulator:
- Hissing or whistling noises.
- Flame sputtering or going out quickly.
- Gas smell near the regulator.
Replace the regulator if any signs appear. Regulators are inexpensive and easy to swap. A good regulator ensures steady gas flow and strong flame.
Adjusting Gas Flow
Gas flow adjustment helps control flame size and heat output. Incorrect flow causes weak flames or uneven heating. Use these tips to adjust gas flow safely:
- Locate the flow control knob on your grill or regulator.
- Turn the knob slowly to increase or decrease gas flow.
- Watch the flame while adjusting; it should be steady and blue.
- Reduce flow if flames are too high or yellow, which wastes gas.
Many grills have a flow adjustment screw inside the regulator. Use a screwdriver to fine-tune gas pressure:
- Turn screw clockwise to increase gas flow.
- Turn screw counterclockwise to reduce flow.
- Make small adjustments and test flame after each change.
Keep flame size moderate. High flames waste fuel and can damage your grill. Low flames cause undercooked food. Proper gas flow keeps your grill working well and food cooking evenly.
Fixing Ignition And Flame Issues
These problems can stop your grill from heating properly. Fixing ignition and flame issues can bring your grill back to life. This section explains simple steps to repair common ignition faults and improve flame quality. Each fix helps your grill work safely and efficiently.
Replacing Igniters
The igniter lights the gas to start the flame. A faulty igniter means your grill won’t light or will light weakly. Replacing the igniter is a common fix for ignition problems.
Steps to replace an igniter:
- Turn off the gas supply and disconnect the propane tank or gas line.
- Remove the grill’s cooking grates and burner covers to access the igniter.
- Locate the igniter button and wire leading to the spark electrode.
- Unscrew or unclip the old igniter carefully.
- Install the new igniter in the same position and reconnect wires.
- Test the igniter by turning on the gas and pressing the button.
Keep these tips in mind:
- Use a replacement igniter made for your grill model.
- Check wires for damage or corrosion before installation.
- Clean the spark electrode with a soft brush if dirty.
| Igniter Issue | Cause | Solution |
| No spark | Broken igniter button or wire | Replace igniter assembly |
| Weak spark | Dirty electrode or loose wire | Clean electrode, tighten connections |
Realigning Burner Tubes
Burner tubes deliver gas evenly to create a steady flame. Misaligned tubes cause low or uneven flames. Realigning burner tubes restores proper gas flow and improves flame size.
Follow these steps to realign burner tubes:
- Turn off gas and let grill cool completely.
- Remove cooking grates and burner covers.
- Check the burner tubes for any bends or shifts.
- Gently move tubes back to original position, ensuring the gas holes face upward.
- Align tubes with the gas valve and ignition source.
- Secure tubes with screws or clips as needed.
- Reassemble grill and test flame strength.
Signs your burner tubes need realignment:
- Flame only on one side of the burner
- Flame flickers or goes out
- Uneven heat on grill surface
Proper alignment helps gas flow smoothly. It prevents blockages and flame irregularities.
Adjusting Air Shutter
The air shutter controls the mix of air and gas for the flame. Incorrect adjustment causes low or yellow flames. Adjusting the air shutter improves combustion and flame color.
To adjust the air shutter:
- Turn off the grill and disconnect the gas supply.
- Locate the air shutter near the burner tube’s gas inlet.
- Loosen the shutter’s screw or clip to move it.
- Open or close the shutter slowly while lighting the burner.
- Look for a steady blue flame with little yellow.
- Tighten the shutter screw once ideal flame appears.
Air shutter adjustment tips:
- A too closed shutter causes a yellow, weak flame.
- A too open shutter makes the flame noisy or lifts off the burner.
- Adjust in small steps and watch the flame carefully.
Proper air-to-gas ratio ensures efficient burning and better heat output.
Preventive Maintenance Tips
Maintaining a gas grill to avoid a low flame is easier than fixing problems after they appear. Preventive maintenance tips help keep the grill running smoothly. Small habits prevent big issues like clogged burners or gas leaks. Follow simple steps regularly to ensure your grill stays in top condition. This section covers key tips to keep your flame strong and steady.
Regular Cleaning Schedule
Cleaning your gas grill often is the best way to stop flame problems. Food particles and grease can block the burners, reducing flame size. Set a cleaning schedule based on how often you use the grill. After every use:
- Brush the grill grates with a wire brush to remove leftover food.
- Empty the grease tray to prevent buildup.
Once a month, do a deeper clean:
- Turn off the gas and disconnect the propane tank.
- Remove the grill grates and burner covers.
- Use warm soapy water and a sponge to clean grates and covers.
- Check burner ports for clogs. Clean gently with a soft brush or a toothpick.
- Wipe down the inside of the grill to remove grease and dirt.
Here is a simple cleaning checklist:
| Cleaning Task | Frequency | Tools Needed |
| Brush grill grates | After each use | Wire brush |
| Empty grease tray | After each use | Gloves, trash bag |
| Clean burner ports | Monthly | Soft brush, toothpick |
| Wash grates and covers | Monthly | Soap, sponge, bucket |
Regular cleaning keeps air flowing well and prevents flame issues. It also extends your grill’s life and improves cooking.
Storing Grill Properly
How you store your gas grill affects flame performance. Exposure to rain, dust, and dirt causes rust and clogs. Protect the grill by following these steps:
- Keep the grill covered with a weatherproof grill cover when not in use.
- Store the grill in a dry place, like a garage or shed, during winter or long periods without use.
- Disconnect the propane tank if storing the grill indoors for safety.
- Place the grill on a flat surface to avoid tipping or damage.
Proper storage prevents moisture from building up inside burners and pipes. Moisture can cause rust that blocks gas flow and lowers flame strength. Dirt and leaves can also enter vents and burners, causing flame problems.
Here is a storage checklist for easy reference:
| Storage Step | Reason |
| Use grill cover | Protects from rain, dust, and dirt |
| Store in dry place | Prevents rust and moisture buildup |
| Disconnect propane tank | Safety and gas leak prevention |
| Keep grill on flat surface | Prevents tipping and damage |
Proper storage keeps your grill ready to use. It also avoids damage that causes low flames.
Routine Inspections
Checking your gas grill regularly helps catch small problems early. Inspections identify worn parts, leaks, or blockages that reduce flame size. Set a schedule to inspect your grill every few weeks or before each grilling season.
Focus on these key areas:
- Gas connections: Check hoses and fittings for cracks or leaks. Use soapy water on connections; bubbles show leaks.
- Burners: Look for rust, holes, or clogged ports. Replace damaged burners immediately.
- Ignition system: Test the spark to ensure easy lighting. Clean or replace faulty igniters.
- Ventilation: Make sure vents and air holes are clear of debris.
Use this inspection checklist:
| Inspection Point | What to Check | Action if Problem |
| Gas hoses and connections | Cracks, leaks, loose fittings | Replace or tighten parts |
| Burner condition | Rust, holes, blockages | Clean or replace burners |
| Ignition system | Spark quality, cleanliness | Clean or replace igniter |
| Air vents and holes | Clear of debris and dirt | Remove blockages |
Routine inspections keep your grill safe and efficient. Catching problems early prevents low flame and gas waste.
Frequently Asked Questions
Why Is My Gas Grill Flame So Low?
A low flame often indicates clogged burners or low gas pressure. Check for dirt, debris, or leaks. Clean the burners and ensure the propane tank is full and valve fully open.
How Do I Clean Clogged Grill Burners?
Turn off the gas and remove the burners. Use a wire brush to clean debris. Clear burner holes gently with a paperclip or toothpick to restore proper gas flow.
Can Low Propane Levels Cause A Weak Flame?
Yes, low propane results in reduced gas pressure, causing a weak flame. Replace or refill the propane tank to restore optimal flame intensity.
How To Check For Gas Leaks In My Grill?
Apply soapy water to connections and valves. Turn on the gas without lighting the grill. Bubbles indicate a leak; tighten connections or replace faulty parts immediately.
Conclusion
Fixing a low flame on your gas grill is simple with the right steps. Clean the burners and check the gas supply first. Make sure the valves open fully and there are no blockages. Regular care keeps your grill working well.
A strong flame cooks food evenly and saves time. Enjoy grilling without worry by keeping your equipment in good shape. Small fixes bring big results. Keep your grill ready for the next cookout.