Every product is independently reviewed and selected by our editors. If you buy something through our links, we may earn an affiliate commission at no extra cost to you.
Congratulations on investing in a kitchen innovation that promises to transform your grilling experience! An automatic grill cleaning robot is more than just a tool—it’s your new partner in achieving spotless, restaurant-quality results with unprecedented ease.
From setting it up to choosing the right cleaning cycle, a few simple steps can make the difference between a quick refresh and a truly deep clean.
Everything You Need to Know, this guide covers the basics every beginner should know, including preparation, safe operation, and expert tips to help you get the best results while protecting your grill.
How to Use Automatic Grill Cleaning Robot for the First Time: Easy Steps for Sparkling Results
Make your first grill cleaning effortless! How to Use Automatic Grill Cleaning Robot for the First Time: Easy Steps for Sparkling Results shows you simple steps to get a spotless grill quickly.

Preparing Your Grill
Preparing your grill before using an automatic grill cleaning robot is essential. It ensures the cleaning process is smooth and effective. Taking time to get your grill ready helps avoid problems and keeps the robot working well. This section explains the key steps to prepare your grill properly for the first use of the cleaning robot.
Clear The Grill Surface
Start by removing all food residues and loose debris from the grill surface. This step helps the cleaning robot work better and prevents it from getting stuck. Use a grill brush or scraper to clear large pieces of burnt food. Make sure you clean between the grill grates as well.
Follow these tips for clearing the grill surface:
- Remove any leftover food scraps.
- Scrape off grease and burnt bits.
- Wipe the surface with a damp cloth if needed.
Here is a simple checklist for clearing the grill:
| Step | Action |
| 1 | Turn off the grill and wait for it to cool slightly. |
| 2 | Use a grill brush to scrape off large food pieces. |
| 3 | Wipe down the grill surface with a cloth if greasy. |
Clear grill surfaces allow the robot to clean more efficiently. Avoid leaving thick layers of food or grease that could block the robot’s brushes or wheels.
Check For Obstructions
Check the grill area for anything that may block the cleaning robot. Obstructions can stop the robot or cause damage. Look for small items, tools, or parts of the grill that stick out. Remove anything that may get in the robot’s way.
Common obstructions to check:
- Thermometers or probes inside the grill.
- Loose grill parts or accessories.
- Charcoal pieces or stones on the grill floor.
- Grease traps or drip pans that are not securely placed.
Use this quick guide to inspect your grill:
- Look inside the grill for foreign objects.
- Secure loose parts or remove them.
- Clear the grill floor and surrounding area.
- Make sure the grill lid can close fully without hitting the robot.
Checking for obstructions protects the robot and your grill. It also ensures the cleaning process is smooth and uninterrupted.
Read Safety Instructions
Before using the automatic grill cleaning robot, read all safety instructions carefully. Safety instructions explain how to use the robot properly and avoid accidents. They help protect you, the grill, and the robot itself.
Key safety points to focus on:
- Do not use the robot on a hot grill unless specified.
- Keep children and pets away during cleaning.
- Use the robot only on compatible grill types and sizes.
- Follow charging and battery guidelines closely.
- Do not attempt to open or repair the robot yourself.
Here is a sample table of common safety warnings:
| Warning | Reason |
| Use only on cool grill surfaces | Prevents burns and damage to robot parts |
| Keep away from water | Protects electrical components |
| Do not block robot sensors | Ensures proper navigation and cleaning |
Reading the safety instructions thoroughly reduces risks. It helps you understand how to operate the robot safely and effectively.
Setting Up The Robot
Setting up your automatic grill cleaning robot properly ensures it works efficiently from the start. This process involves preparing the robot by charging it, attaching the right cleaning brushes, and connecting it to a power source. Each step is simple but important. Taking time to set up the robot correctly helps you avoid problems and get the best cleaning results on your grill.
Charge The Robot Fully
Before using the robot for the first time, charge it fully. A full charge ensures the robot runs long enough to clean your grill without stopping. Most automatic grill cleaning robots come with a battery indicator to show the charging status.
Follow these steps to charge the robot:
- Place the robot on its charging dock or plug in the charger to the robot’s charging port.
- Connect the charger to a power outlet.
- Check the battery indicator light. Usually, red means charging, and green means fully charged.
- Wait until the indicator shows a full charge before unplugging the robot.
Charging time varies by model but usually takes between 2 to 4 hours. Avoid using the robot while charging to protect the battery life.
| Charging Status | Indicator Light | Action Needed |
| Charging | Red or blinking light | Keep connected to power |
| Fully Charged | Green or solid light | Unplug and prepare for use |
Make sure the charging dock is on a flat surface and away from water or heat sources. This protects the robot and charger from damage.
Attach Cleaning Brushes
Attaching the correct cleaning brushes is key to effective grill cleaning. Different brushes work best on different grill surfaces. The robot usually comes with multiple brush types, such as wire brushes or silicone brushes.
Follow these steps to attach the brushes:
- Identify the brush holders on the bottom of the robot.
- Select the brushes based on your grill type. Wire brushes work well for tough grease. Silicone brushes are better for delicate surfaces.
- Align the brush with the holder and press it firmly until it clicks into place.
- Check that the brushes are secure and do not wobble.
Brush care tips:
- Clean brushes after each use to prevent buildup.
- Replace worn or damaged brushes to keep cleaning effective.
- Store extra brushes in a dry place.
Using the right brushes helps the robot clean faster and protects your grill grates from scratches or damage.
Connect To Power Source
Connecting the robot to a power source is the last step before cleaning. Some models work on battery power alone. Others need to stay plugged in during use for constant power.
Follow these steps to connect the robot safely:
- Locate the power cord and plug that came with the robot.
- Plug the power cord into the robot’s power input port. This port is usually near the charging port.
- Connect the other end of the cord to a nearby electrical outlet.
- Make sure the cord is not stretched tight or in a place where it can trip someone.
Important safety tips:
- Do not use the robot if the cord or plug is damaged.
- Keep the power connection dry and away from water.
- Unplug the robot after cleaning is finished.
Some robots have a power switch that you must turn on after connecting. Check your manual for this step. Having a stable power connection helps the robot run smoothly and clean your grill well.
Starting The Cleaning Process
Starting the cleaning process with an automatic grill cleaning robot is simple and efficient. This step sets the stage for a thorough and hassle-free grill cleaning. Proper placement, mode selection, and watching the robot’s first moves will ensure the best results. Follow these steps carefully to protect your grill and get it sparkling clean.
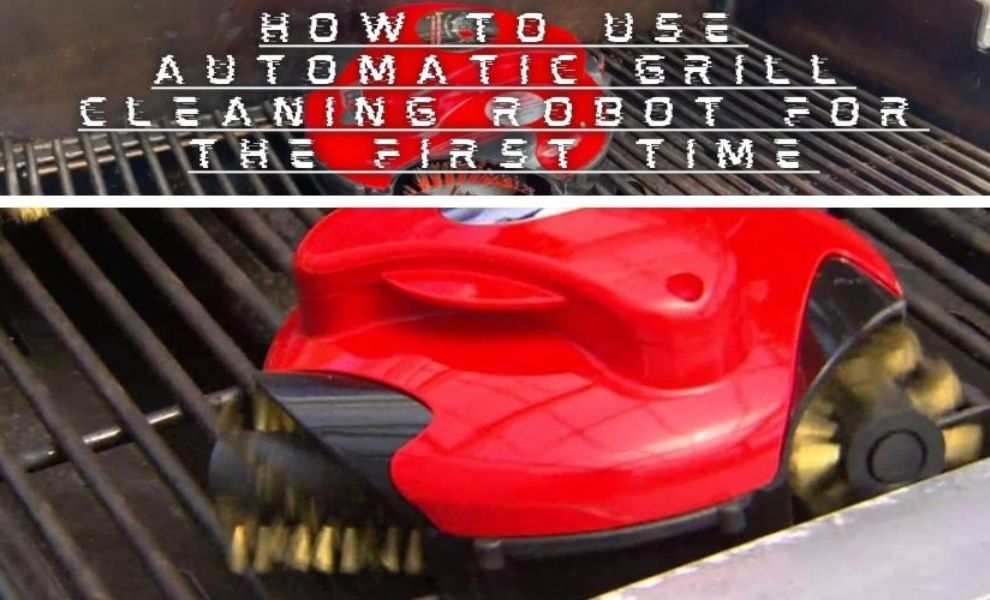
Place Robot On The Grill
Begin by placing the cleaning robot correctly on your grill. Positioning the robot well helps it clean evenly and avoid damage. Make sure the grill is cool before you start to prevent burns and ensure safety.
- Open the grill lid fully to give the robot enough space to move.
- Clear large food scraps from the grill surface to avoid clogging the robot brushes.
- Place the robot gently on the grill grates, centering it as much as possible.
- Check the robot’s wheels or brushes for any blockages before setting it down.
Use the table below to check key points before starting:
| Check Item | Why It Matters | Action |
| Grill Temperature | Prevents damage and injury | Ensure grill is cool |
| Grill Surface | Allows smooth robot movement | Remove large debris |
| Robot Condition | Ensures proper function | Check wheels and brushes |
Placing the robot carefully helps it clean every corner. Avoid putting it near grill edges or uneven spots. This reduces the risk of falls or damage.
Select Cleaning Mode
The robot usually offers different cleaning modes. Each mode fits a specific cleaning need. Choose the right mode to match your grill’s condition. This step saves time and improves cleaning results.
Common modes include:
- Quick Clean: For light dirt and small grease spots.
- Deep Clean: For heavy grease and stuck-on food.
- Spot Clean: For focused cleaning of a small area.
- Auto Clean: Robot decides the best cleaning pattern.
Use the table below to help select the mode:
| Grill Condition | Recommended Mode | Cleaning Time |
| Light grease and crumbs | Quick Clean | 10-15 minutes |
| Heavy grease and stuck food | Deep Clean | 20-30 minutes |
| Small dirty spot | Spot Clean | 5-10 minutes |
| General cleaning | Auto Clean | 15-25 minutes |
Refer to your robot’s manual for specific mode instructions. Some models allow you to adjust time or brush speed. Adjust these settings based on how dirty your grill is.
Monitor Initial Operation
Start the robot and watch its first few minutes of cleaning. Monitoring early operation helps catch any problems before they get worse. It also ensures the robot moves correctly and cleans well.
Key points to watch:
- Movement: The robot should move smoothly and cover the grill evenly.
- Brush action: Brushes should spin without obstruction.
- Noise: Listen for unusual sounds that could signal a problem.
- Safety: Make sure the robot stays on the grill and does not overheat.
If you see any issues, pause the robot and check for:
- Brushes tangled with debris
- Robot stuck on grill edges
- Battery level or power connection problems
Adjust the robot’s position or settings as needed. Once everything works smoothly, allow the robot to finish the cleaning cycle. Regularly checking during the first run builds confidence in your grill cleaning robot.
Post-cleaning Steps
After the automatic grill cleaning robot finishes its job, some important post-cleaning steps ensure your grill stays in great condition. These steps help keep the robot working well and your grill ready for the next barbecue. Taking time to clean the brushes, wipe the grill, and store the robot properly saves effort later and extends the life of your tools.
Remove And Clean Brushes
The brushes on your automatic grill cleaning robot collect grease and food particles during cleaning. Removing and cleaning these brushes after each use is crucial.
- Turn off and unplug the robot. Safety first before handling any parts.
- Detach the brushes carefully. Most models allow easy removal by pressing a button or sliding them off.
- Use warm water and mild soap. Soak the brushes for 10-15 minutes to loosen stuck debris.
- Scrub gently with a soft brush or cloth. Avoid using metal tools that can damage the bristles.
- Rinse thoroughly. Make sure all soap and debris are washed away.
- Let the brushes dry completely. Place them in a well-ventilated area before reattaching or storing.
Regular cleaning prevents buildup that can reduce the robot’s efficiency. Dirty brushes may also scratch the grill surface. Follow your robot’s manual for any specific brush care instructions.
Wipe Down The Grill
After the robot cleans the grill grates, some residue or moisture might remain. Wiping down the grill keeps it safe from rust and leftover food.
Use a clean cloth or paper towel with these steps:
- Wait for the grill to cool. Avoid burns by touching only after cooling.
- Remove the robot and brushes. Make sure all cleaning parts are off the grill.
- Wipe the grates gently. Use a damp cloth to remove grease or loose particles.
- Dry the grates thoroughly. Use a dry towel to prevent water spots or rust.
- Check for any stuck residue. Use a grill scraper if needed, but be gentle.
This simple step keeps your grill clean and ready for the next cookout. It also protects the metal from corrosion caused by moisture left on the surface.
Store The Robot Properly
Proper storage of your automatic grill cleaning robot helps protect it from damage and dirt. Follow these tips for storing the robot safely:
| Step | Action | Reason |
| 1 | Remove and dry all detachable parts | Prevents rust and mold growth |
| 2 | Store in a cool, dry place | Keeps electronics and brushes safe |
| 3 | Keep away from direct sunlight | Prevents material damage and fading |
| 4 | Cover with a dust cloth or case | Protects from dust and dirt accumulation |
Following these steps helps keep the robot in good condition, reducing wear and tear. It also ensures the robot is ready and clean for the next use.
Troubleshooting Common Issues
Using an automatic grill cleaning robot for the first time can save hours of scrubbing. Still, like any device, it may face some common issues. Understanding how to troubleshoot these problems helps keep the robot working well and your grill spotless. This section covers easy fixes for the most frequent issues users face.
Robot Not Starting
Sometimes, the grill cleaning robot may not start at all. This can be frustrating, but many causes are simple to check and fix. First, ensure the robot is properly charged or plugged in. A low battery or no power connection is the most common reason the robot won’t start.
- Check the power source: Confirm the charger is connected to a working outlet.
- Inspect the battery: Some models have removable batteries. Make sure it is inserted correctly.
- Reset the robot: Press the reset button or follow the manual’s reset instructions.
- Remove obstacles: Clear any debris or items blocking the robot’s sensors or wheels.
If these steps fail, look at the error indicator lights or display. Most robots show error codes. Use the manual to decode these signals. Sometimes, a firmware update is needed. Connect the robot to your computer or app and check for software updates.
| Issue | Possible Cause | Solution |
| Robot does not start | Battery empty or not inserted | Charge battery or insert correctly |
| Robot does not start | Power outlet not working | Test outlet or use another one |
| Robot does not start | Software error | Reset robot or update firmware |
Uneven Cleaning
Uneven cleaning means the robot misses spots or cleans some areas more than others. This problem lowers cleaning quality. Several reasons cause uneven cleaning. Check the grill surface first. Heavy grease or stuck food can block the brushes.
Next, check the robot’s brushes and wheels. Dirty or worn parts reduce performance. The robot’s navigation system may also have trouble detecting grill edges or corners.
- Clean grill surface: Remove large food scraps manually before running the robot.
- Inspect brushes: Clean or replace dirty brushes to improve contact with the grill.
- Check wheels: Remove debris stuck in wheels to ensure smooth movement.
- Reset navigation: Restart the robot to recalibrate sensors.
- Clear sensor lenses: Wipe lenses gently with a soft cloth.
Sometimes, the grill layout affects cleaning. The robot may struggle with uneven grill bars or tight spaces. Position the robot at different starting points for better coverage. Run the cleaning cycle twice if needed.
Brush Wear And Tear
Brushes wear down with regular use. Worn brushes clean less effectively and can scratch the grill surface. It is important to check brushes regularly and replace them on time. Most manufacturers recommend replacing brushes every few months or after a set number of uses.
Signs of worn brushes include:
- Frayed or missing bristles
- Reduced cleaning power
- Unusual noise during operation
Follow these steps to maintain brushes:
- Remove brushes according to the manual.
- Clean brushes with warm soapy water. Let dry completely.
- Inspect for damage or wear.
- Replace brushes if bristles are bent or missing.
- Keep spare brushes handy for quick replacement.
Using the right brushes is crucial. Some grills need soft brushes, others need stiff ones. Check your robot’s user guide to buy compatible brushes. Proper brush care extends the robot’s life and improves cleaning results.
Tips For Optimal Performance
Using an automatic grill cleaning robot makes grill care easier and faster. To get the best results, follow a few simple tips for optimal performance. Proper use keeps the robot working well and your grill spotless. These tips include regular maintenance, using the right cleaning agents, and scheduling cleanings correctly. Each step helps the robot clean deeply and last longer.
Regular Maintenance
Regular maintenance keeps your grill cleaning robot in top shape. Clean the brushes and wheels after each use to avoid buildup. Check for damage or wear before every cleaning session. Replace worn parts quickly to prevent poor cleaning performance. Store the robot in a dry place to avoid rust and electrical problems.
- Brush Cleaning: Remove grease and food particles from brushes.
- Wheel Check: Ensure wheels move smoothly without obstruction.
- Battery Care: Charge fully and avoid letting the battery drain completely.
- Sensor Cleaning: Wipe sensors gently to keep navigation accurate.
| Maintenance Task | Frequency | Tools Needed |
| Brush cleaning | After each use | Soft brush, warm water |
| Wheel check | Weekly | Cloth, screwdriver |
| Battery charging | After each use | Charger |
| Sensor cleaning | Weekly | Microfiber cloth |
Following this routine keeps the robot ready to clean your grill efficiently every time.
Using Recommended Cleaning Agents
Use only cleaning agents recommended by the robot manufacturer. Harsh chemicals can damage the robot’s parts or grill surface. Mild detergents or grill-specific cleaners work best. Avoid abrasive powders or solvents. These can harm brushes and sensors.
- Check labels: Use non-toxic, grill-safe cleaners.
- Test first: Apply a small amount on the grill before full use.
- Follow instructions: Use the right amount to avoid residue buildup.
Here is a quick guide to cleaning agents:
| Type of Agent | Use Allowed | Notes |
| Mild detergent | Yes | Safe for brushes and sensors |
| Grill-specific cleaner | Yes | Effective on grease and food residue |
| Abrasive powder | No | Damages brushes and surfaces |
| Solvents (e.g., acetone) | No | Harms plastic and electronics |
Use the right agents to protect the robot and clean thoroughly.
Scheduling Cleanings
Schedule cleanings based on grill use and type of food cooked. Frequent grilling needs more regular cleanings. Set a cleaning routine to keep the grill ready for next use. Avoid long gaps that allow grease to harden and food to stick.
- Daily use: Clean after every grilling session.
- Weekly use: Clean once or twice a week.
- Occasional use: Clean before and after grilling days.
Use a timer or phone reminder to keep on track. Some robots allow programming cleaning times, making scheduling easy. Consistent cleaning prevents buildup and extends the grill’s life.
| Grill Use Frequency | Recommended Cleaning Schedule | Benefits |
| Daily | After each use | Prevents buildup, keeps grill fresh |
| Weekly | 1-2 times per week | Keeps grill clean, reduces effort |
| Occasional | Before and after grilling | Ensures cleanliness, avoids rust |
Stick to a cleaning schedule for best results and less manual work.
Frequently Asked Questions
How Do I Set Up An Automatic Grill Cleaning Robot?
To set up, place the robot on a cooled grill surface. Connect it to power or charge fully. Follow the manufacturer’s instructions for activating the cleaning cycle. Ensure the grill is free of large debris before starting for best results.
Can I Use The Robot On All Grill Types?
Most automatic grill cleaning robots work on gas, charcoal, and electric grills. However, check your robot’s manual for compatibility. Using it on unsupported surfaces may damage both the grill and the robot. Always verify before use to avoid issues.
How Long Does The Cleaning Cycle Usually Take?
Cleaning time typically ranges between 15 to 30 minutes. This depends on grill size and dirt level. The robot automatically stops after completing the cycle. Monitor the first few uses to understand timing better.
Is It Safe To Use The Robot On A Warm Grill?
It’s best to use the robot on a cooled or slightly warm grill. High heat can damage the robot or cause safety hazards. Always check the user guide for recommended temperature ranges before starting.
Conclusion
Using an automatic grill cleaning robot saves time and effort. Start by reading the instructions carefully. Place the robot on a cool grill surface. Turn it on and let it work quietly. Watch it move and clean every spot. After cleaning, remove the robot and wipe the grill.
Regular use keeps your grill neat and ready. Enjoy grilling without the hard cleanup. Simple steps lead to a cleaner grill every time. Try it today for easier grill care.