Every product is independently reviewed and selected by our editors. If you buy something through our links, we may earn an affiliate commission at no extra cost to you.
There’s nothing more disappointing than carefully seasoned chicken or a beautiful, marbled steak tearing and sticking to the grill grates. That single misstep can turn a perfect meal into a puzzle of shredded food.
Fortunately, this common grilling woe has a remarkably simple fix. The question isn’t really if you should oil your grill grates, but how to do it correctly.
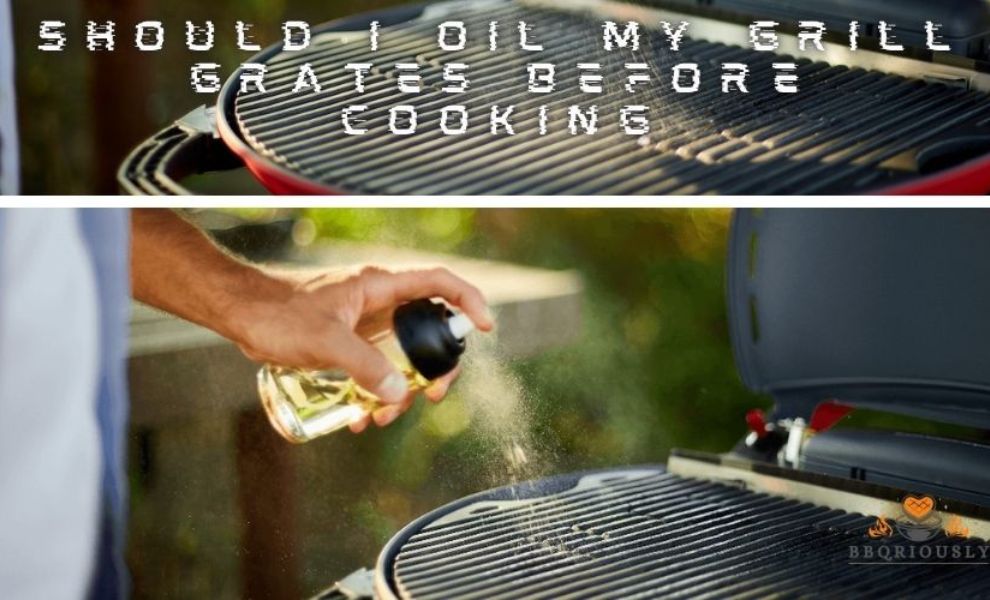
Should I Oil My Grill Grates before Cooking: Expert Tips Revealed
Wondering if you should oil your grill grates before cooking? This simple step can make all the difference between perfectly grilled food and a sticky mess. In this guide, we reveal expert tips on when and how to oil your grates for smooth cooking, easy cleanup, and flawless grill marks every time.
Benefits Of Oiling Grill Grates
Oiling grill grates before cooking is a simple step that many grillers overlook. Yet, it offers several key benefits that improve grilling results and extend the life of your grill.
The main advantages include preventing food from sticking, enhancing the flavor and texture of grilled items, and protecting the grill grates from rust and damage. Understanding these benefits helps decide why oiling your grill grates is an important part of the grilling process.
Preventing Food Sticking
One of the biggest challenges during grilling is food sticking to the grill grates. Oiling the grates creates a thin layer of lubrication, which acts as a barrier between the food and metal surface. This layer helps food release easily, reducing tearing and loss of flavor.
- Easy flipping: Oiled grates allow you to flip burgers, steaks, or vegetables without them sticking.
- Better grill marks: Food cooks evenly and gets attractive grill marks without sticking.
- Less mess: Prevents food particles from burning and accumulating on the grates.
Using oil also reduces frustration and waste. Foods like fish and delicate vegetables benefit most from this step. Without oil, these foods may stick badly and break apart.
| Food Type | Effect of Oiling Grill Grates |
| Steak | Prevents sticking and promotes even searing |
| Fish | Protects fragile flesh from tearing |
| Vegetables | Helps maintain shape and texture |
Enhancing Flavor And Texture
Oiling grill grates improves the taste and feel of grilled food. The oil creates a slight crust on the surface of meats and vegetables. This crust locks in juices and adds texture to every bite.
Oiling can:
- Promote even browning: Oil heats up quickly, helping food brown evenly.
- Reduce dryness: The oil layer keeps moisture inside grilled items.
- Add subtle flavor: Some oils, like olive or avocado, add mild flavor notes.
When food does not stick, it cooks better and develops a more appealing texture. The slight crispiness on the outside contrasts with tender inside, making grilled meals more enjoyable.
Using oil also helps prevent food from burning. Burnt food tastes bitter and can ruin the meal. Oiling the grill grates ensures a cleaner cooking surface and better flavor every time.
Protecting Grill Grates From Rust
Grill grates face high heat and exposure to moisture, which can cause rust. Oiling the grates forms a protective layer that helps prevent rust formation. This layer acts as a shield against water and air.
- Prevents corrosion: Oil blocks moisture from reaching metal grates.
- Extends grill life: Less rust means the grates last longer and perform better.
- Easy cleaning: Oiled grates stay cleaner and resist buildup.
Rusty grates not only look bad but can affect food safety and grill function. Regularly oiling the grill grates after cleaning helps maintain the grill in good condition. Use high smoke point oils like canola or grapeseed for best protection.
| Oil Type | Smoke Point | Rust Protection Quality |
| Canola Oil | 400°F (204°C) | High |
| Vegetable Oil | 400°F (204°C) | High |
| Olive Oil | 375°F (190°C) | Moderate |

Types Of Oils To Use
Oiling grill grates before cooking helps prevent food from sticking and creates beautiful grill marks. Choosing the right type of oil is crucial because it affects the flavor, safety, and performance of your grilling.
Not all oils work well on high heat. This section explains the best oils for grilling, the difference between natural and flavored oils, and which oils to avoid for your safety and taste.
High Smoke Point Oils
Oils with a high smoke point are ideal for grilling. The smoke point is the temperature at which oil starts to burn and produce smoke. Using oils with a high smoke point prevents burning and harmful chemicals from forming on your grill.
Common high smoke point oils include:
- Avocado oil (smoke point around 520°F / 271°C)
- Refined safflower oil (smoke point around 510°F / 266°C)
- Refined peanut oil (smoke point around 450°F / 232°C)
- Grapeseed oil (smoke point around 420°F / 216°C)
- Refined sunflower oil (smoke point around 450°F / 232°C)
These oils can handle the intense heat of grilling without breaking down. Unrefined oils tend to have lower smoke points and may burn quickly, leaving unpleasant flavors.
| Oil | Smoke Point (°F) | Smoke Point (°C) |
| Avocado Oil | 520 | 271 |
| Safflower Oil (Refined) | 510 | 266 |
| Peanut Oil (Refined) | 450 | 232 |
| Grapeseed Oil | 420 | 216 |
| Sunflower Oil (Refined) | 450 | 232 |

Choose oils with smoke points above 400°F for safe and effective grilling.
Natural Vs. Flavored Oils
Natural oils have no added flavors. Flavored oils contain herbs, spices, or other ingredients to add taste. Both types can be used for grilling, but they serve different purposes.
Natural oils are best for general grilling. They do not change the food’s flavor and allow the natural taste of meat or vegetables to shine.
- Examples: avocado oil, grapeseed oil, refined olive oil
- Help create a non-stick surface
- Resist high heat without burning easily
Flavored oils add taste to food but often have lower smoke points. They are best applied after cooking or on low-heat grills.
- Examples: garlic-infused oil, chili oil, herb oil
- Can burn quickly and create bitter flavors
- Should not be used for direct high-heat grilling
Use natural oils to oil grill grates before cooking. Apply flavored oils to food after grilling for best taste and safety.
Avoiding Harmful Oils
Some oils are not safe or healthy for grilling. Oils with low smoke points burn easily and release toxic compounds. These compounds affect food taste and may harm health.
Oils to avoid for grilling:
- Unrefined or virgin oils with low smoke points: flaxseed oil, extra virgin olive oil, walnut oil
- Partially hydrogenated oils: contain trans fats, bad for health
- Butter and animal fats: burn quickly and create flare-ups
Burned oil can give food a bitter taste and cause smoke that irritates eyes and lungs. Always check the smoke point and type of oil before grilling.
Use this quick guide:
| Oil Type | Safe for High Heat? | Reason |
| Refined Oils (Avocado, Peanut) | Yes | High smoke point, stable at heat |
| Unrefined Oils (Flaxseed, Extra Virgin Olive) | No | Low smoke point, burns easily |
| Flavored Oils | No | Added ingredients lower smoke point |
| Butter and Animal Fats | No | Burns quickly, causes flare-ups |
When To Oil Your Grill Grates
Oiling grill grates is a simple step that helps prevent food from sticking and makes cleanup easier. Knowing when to oil your grill grates can improve your cooking results and protect the grill surface. Timing is key. Oiling at the right moment ensures a non-stick surface and better flavor. This guide explains the best times to apply oil on your grill grates: before preheating, after preheating, and during cooking.
Before Preheating
Oiling your grill grates before preheating creates a protective layer that helps prevent rust and sticking. The grates are cool at this point, making it easier to apply oil evenly. Use a high-smoke point oil like canola or vegetable oil for best results.
- Use a paper towel or brush dipped in oil to coat the grates.
- Apply lightly to avoid flare-ups caused by excess oil.
- Focus on all grate surfaces, including edges.
This step works well for cast iron grates, which need extra protection from rust. For stainless steel grates, oiling before preheating helps build a thin, non-stick layer as the grill heats up.
| Advantages of Oiling Before Preheating | Notes |
| Protects grates from rust | Especially important for cast iron |
| Prevents food from sticking | Creates a smooth cooking surface |
| Even oil coverage | Easier to apply on cool grates |
After Preheating
Oiling after preheating is a popular choice for many grillers. The grates are hot and open pores on the surface, which helps the oil bond well. This method creates a slick, non-stick surface right before cooking.
Steps to oil after preheating:
- Turn on the grill and let it heat for 10-15 minutes.
- Use tongs to hold an oil-soaked paper towel.
- Rub the paper towel over the hot grates carefully.
Be cautious: applying oil on very hot grates can cause flare-ups. Use small amounts and keep a close eye on the grill.
This method is excellent for quick grilling sessions. It seals the grates and helps food release easily without tearing or sticking.
| Benefits of Oiling After Preheating | Tips |
| Creates a strong non-stick surface | Best for fast grilling |
| Oil bonds to hot metal pores | Improves food release |
| Easy and quick application | Use tongs for safety |
During Cooking
Oiling during cooking helps maintain a non-stick surface, especially for longer grill sessions. It can also add flavor and moisture to food. Use a spray bottle or brush to add oil carefully without causing flare-ups.
Tips for oiling during cooking:
- Use a high-smoke point oil to avoid burning.
- Apply oil lightly between flipping food items.
- Keep some distance to avoid flames.
- Focus on areas where food tends to stick.
This step is helpful for grilling sticky foods like fish or marinated vegetables. It refreshes the oil layer and prevents food from tearing or losing juices.
Warning: Do not pour oil directly on the grill surface. This causes dangerous flare-ups and uneven cooking.
Oiling during cooking also helps keep the grill grates in good condition. It reduces the buildup of burnt food residue and makes cleaning easier after cooking.
How To Properly Oil Grill Grates
Oiling grill grates before cooking helps keep food from sticking and makes cleaning easier. Properly oiled grates protect the metal and improve grilling results. Learning how to oil grill grates the right way saves time and keeps your grill in good shape. Follow simple steps and use the right tools for best results.
Tools Needed
To oil grill grates correctly, gather a few basic tools. These items help spread oil evenly and safely on the hot surface.
- High smoke point oil: Choose oils like canola, vegetable, or grapeseed oil. These oils can handle heat without burning.
- Grill brush or scraper: Use this to clean the grates before oiling. Removing debris ensures better oil coverage.
- Long-handled brush or paper towels: Use for applying oil. Long handles keep your hands safe from heat.
- Tongs: Helpful to hold paper towels or brushes while applying oil.
- Heat-resistant gloves: Protect your hands from burns during the process.


Below is a simple table showing the tools and their purpose:
| Tool | Purpose |
| High Smoke Point Oil | Prevent sticking and withstand heat |
| Grill Brush | Clean grates before oiling |
| Long-handled Brush or Paper Towels | Apply oil evenly |
| Tongs | Hold applicator safely |
| Heat-resistant Gloves | Protect hands from heat |
Step-by-step Oiling Process
Follow these steps to oil grill grates properly. Preparation and timing are key to success.
- Clean the grill grates: Heat the grill on high for 10-15 minutes. Use a grill brush to scrape off food and residue.
- Turn off the grill: Let the grates cool slightly but stay warm. Warm grates absorb oil better.
- Prepare the oil applicator: Dip a folded paper towel or a long-handled brush in oil. Use tongs to hold it.
- Apply oil carefully: Rub the oil-covered towel or brush over the grill grates. Cover all surfaces evenly.
- Reheat the grill: Turn the grill back on high for 5 minutes. This helps the oil soak in and creates a non-stick surface.
Use this simple code snippet to remember the steps:
1. Clean grates 2. Let grates cool a bit 3. Dip applicator in oil 4. Apply oil evenly 5. Reheat grill briefly
Safety Tips
Oiling hot grill grates requires caution. Following safety tips prevents accidents and injuries.
- Wear heat-resistant gloves: Protect your hands from burns while handling hot grates and tools.
- Use long-handled tools: Keep a safe distance from the heat source when applying oil.
- Apply oil off direct flame: Turn off burners or move oiling to cooler parts of the grill to avoid flare-ups.
- Avoid excessive oil: Too much oil can cause flames and smoke. Use just enough to coat grates lightly.
- Keep a fire extinguisher nearby: Be ready for unexpected flare-ups or accidents.
- Do not pour oil directly on flames: Always apply oil with a brush or towel to control amount and placement.
These safety steps help create a safer grilling experience and protect your grill gear.
Alternatives To Oiling Grill Grates
Oiling grill grates before cooking is a common step to prevent food from sticking. But sometimes, oiling may not be the best choice. Alternatives exist that keep food from sticking and make grilling easier. These options can save time, reduce flare-ups, and improve grill maintenance. Exploring these alternatives helps find the best method for your grilling style and gear.
Using Non-stick Sprays
Non-stick sprays provide a quick way to coat grill grates before cooking. They create a thin, even layer that helps food release easily. These sprays often contain ingredients that resist high heat and stickiness. Spraying grill grates is faster than applying oil with a brush or cloth.

- Choose sprays made for high heat to avoid burning or toxic fumes.
- Apply spray before preheating the grill for better coverage.
- Do not spray directly on flames to prevent flare-ups.
Here is a simple guide to using non-stick sprays effectively:
| Step | Action | Tip |
| 1 | Clean grill grates thoroughly | Remove old food and grease |
| 2 | Turn on the grill and preheat | Heat to desired cooking temperature |
| 3 | Turn off or lower heat slightly | Prevent spray from igniting |
| 4 | Spray a light coat on grates | Use even strokes for coverage |
| 5 | Return heat to cooking level | Start grilling food |
Non-stick sprays are easy to find and use. They reduce mess and keep grill grates in good shape. Just follow safety steps for the best results.
Seasoning Cast Iron Grates
Seasoning is a natural way to make cast iron grill grates non-stick. It means coating them with oil and heating until a hard, smooth layer forms. This layer protects the metal and stops food from sticking. Seasoning improves over time with use.
Steps to season cast iron grates:
- Clean grates with warm water and a brush.
- Dry completely to prevent rust.
- Apply a thin layer of cooking oil (vegetable or flaxseed oil works well).
- Heat the grates in the grill at 350–400°F for one hour.
- Turn off grill and let grates cool inside.
Benefits of seasoning cast iron grates:
- Creates a natural non-stick surface.
- Protects grates from rust and damage.
- Improves flavor by adding a smoky taste.
- Lasts longer with regular use and maintenance.
Seasoning takes some time but pays off with better grilling results. Repeat the process every few months or after deep cleaning.
Cleaning Techniques To Prevent Sticking
Clean grill grates help prevent food from sticking. Removing old grease and food bits creates a smooth surface. Proper cleaning also keeps your grill safe and efficient. Different tools and methods work for various grill types.
Effective cleaning techniques:
- Use a grill brush with stiff bristles to scrape grates after cooking.
- Clean grates when warm but not too hot to avoid burns.
- Soak grates in warm, soapy water for a deep clean.
- Rinse and dry grates completely to prevent rust.
Table of common cleaning tools and uses:
| Tool | Use | Best For |
| Wire grill brush | Scraping off food residue | Steel and cast iron grates |
| Grill stone | Removing rust and burnt bits | Porcelain-coated grates |
| Scraper tool | Scraping stuck food | All grate types |
| Soapy water soak | Deep cleaning | Removable grates |
Regular cleaning keeps grates smooth and ready. Clean grates reduce sticking and improve cooking quality. Combine cleaning with other methods for best grilling experience.
Common Mistakes To Avoid
Oiling grill grates before cooking helps prevent food from sticking and makes cleaning easier. But many people make simple mistakes that reduce these benefits. Avoiding these errors keeps your grill working well and your food tasting great. Below are common mistakes to watch out for when oiling your grill grates.
Using Too Much Oil
Applying too much oil on grill grates can cause flare-ups and uneven cooking. Excess oil drips onto the flames, leading to smoke and burnt flavors. It also creates sticky, hard-to-clean residue on the grates.
Tips to avoid using too much oil:
- Use a paper towel or brush to apply a thin, even layer.
- Avoid pouring oil directly onto the grates.
- Apply oil just enough to coat the surface lightly.
Here is a simple guideline for oil amounts:
| Grate Size | Oil Amount |
| Small (up to 300 sq. in.) | 1 teaspoon |
| Medium (300-600 sq. in.) | 1-2 teaspoons |
| Large (600+ sq. in.) | 2-3 teaspoons |
Remember, less oil is better. A thin layer prevents sticking without causing flare-ups. Over-oiling risks ruining your food and grill.
Oiling Cold Grates
Oiling grill grates when they are cold can cause oil to soak into the metal unevenly. The oil may burn off quickly once the grill heats up, losing its non-stick effect. Cold grates also make oil spread poorly, creating sticky patches.
Best practice:
- Preheat the grill for 10-15 minutes until very hot.
- Turn off or lower the heat to medium.
- Apply oil carefully with a paper towel or brush.
- Use tongs to avoid burns and protect hands.
Oiling hot grates ensures the oil instantly creates a thin, protective layer. This layer helps food release easily and protects the metal from rust.
Quick summary:
- Cold grates = uneven oil coating and poor non-stick.
- Hot grates = immediate oil seasoning and better cooking.
- Use a safe tool like tongs to apply oil.
Using The Wrong Type Of Oil
Not all oils are safe or effective for grilling. Oils with low smoke points burn quickly, creating unpleasant flavors and harmful smoke. Using the wrong oil can also leave sticky or sticky residues on your grill.
Choose oils with high smoke points for grilling:
| Oil Type | Smoke Point (°F) | Best Use |
| Canola Oil | 400-450 | Great for grilling |
| Vegetable Oil | 400-450 | Good for high heat |
| Peanut Oil | 450 | Excellent for grilling |
| Olive Oil (Extra Virgin) | 320-375 | Better for low heat or finishing |
| Butter | 300 | Not recommended for grates |
Avoid these oils for grill grates:
- Butter or margarine – burns fast and creates residue.
- Extra virgin olive oil – low smoke point, burns easily.
- Flavored or infused oils – can leave sticky buildup.
Use neutral oils with high smoke points for clean, safe grilling. This choice protects your food and grill grates.
Frequently Asked Questions
Should I Oil Grill Grates Before Cooking?
Oiling grill grates prevents food from sticking and makes cleaning easier. It creates a non-stick surface that helps cook food evenly and retain flavor.
What Type Of Oil Is Best For Grill Grates?
Use high smoke point oils like canola, vegetable, or grapeseed oil. These oils withstand high heat without burning and maintain a clean grilling surface.
How Often Should I Oil Grill Grates?
Oil grill grates before each cooking session. Regular oiling ensures consistent non-stick protection and prolongs the life of your grill grates.
Can I Use Cooking Spray On Grill Grates?
Cooking spray can cause flare-ups and sticky residue. It’s better to use a brush or cloth with oil for safer, cleaner grilling.
Conclusion
Oiling grill grates helps stop food from sticking. It also makes cleaning easier after cooking. Use a high smoke point oil for best results. Apply oil carefully to avoid flare-ups. Small steps like this improve your grilling experience. Enjoy tasty food with less hassle.
Remember, safety comes first when handling hot grills. Try oiling your grates next time you grill. You might find it makes a big difference. Simple actions lead to better meals and happy cookouts.