Every product is independently reviewed and selected by our editors. If you buy something through our links, we may earn an affiliate commission at no extra cost to you.
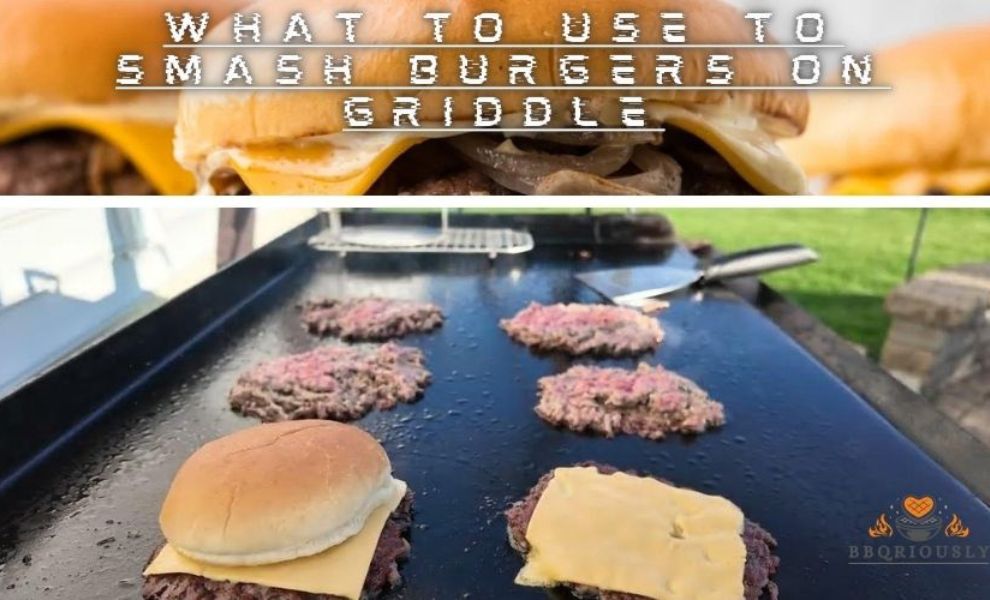
A great smash burger is all about pressure, heat, and the right tool. If you’re searching for what to use to smash burgers on a griddle, you don’t need professional kitchen gear to get restaurant-style results.
From basic presses to everyday kitchen items, this guide highlights simple tools that work, helping you create thin, crispy-edged burgers with juicy flavor every time.
What to Use to Smash Burgers on Griddle: Top Tools for Perfect Patties
This guide covers the top tools for perfect patties, helping you get crispy edges, even thickness, and juicy results every time. Keep reading, and you’ll never struggle with a soggy or unevenly cooked burger again!
Best Tools For Smashing Burgers
Smashing burgers on a griddle needs the right tools to get that perfect sear and juicy inside. Using proper equipment helps press the patties evenly and quickly. It also creates those crispy edges that make smashed burgers special. Choosing the best tools can make cooking easier and tastier. Below are some of the best options for smashing burgers at home or in a professional kitchen.
Metal Spatulas
Metal spatulas are the most common tool for smashing burgers on a griddle. They are strong, thin, and flat, making it easy to press the patty down firmly. A good metal spatula also slides under the burger smoothly, which helps flip it without breaking.
- Durability: Metal spatulas last long and resist heat well.
- Control: The flat edge gives great control for pressing evenly.
- Size: Wide spatulas cover more surface, perfect for big patties.
- Comfort: Choose one with a sturdy handle for a firm grip.
Here is a quick comparison of popular metal spatula features:
| Feature | Thin Edge | Handle Comfort | Heat Resistance |
| Stainless Steel Spatula | Excellent | Good | High |
| Aluminum Spatula | Good | Average | Medium |
| Carbon Steel Spatula | Excellent | Good | High |

Metal spatulas are simple but effective tools that every burger lover should have. They give the best balance of smashing power and flipping ease.
Burger Presses
Burger presses are designed to shape ground beef into uniform patties and can also be used to smash them on a griddle. These tools help create consistent thickness and size, which cooks evenly and looks professional.
Key benefits of burger presses include:
- Uniform patties: Keeps burgers the same size every time.
- Easy smashing: Presses down firmly without much effort.
- Less mess: Helps contain the meat and reduce sticking.
- Time-saving: Shapes multiple patties quickly before cooking.
Most burger presses come in two types:
- Manual presses: Simple hand tools that need physical pressure.
- Mechanical presses: Use a lever or screw for stronger pressing power.

Use a burger press to shape patties, then place them on the griddle. Press again lightly to get the smashed effect and crispy edges. Presses work well for thicker patties that need flattening during cooking.
Cast Iron Presses
Cast iron presses are heavy, flat tools designed for smashing burgers and other foods on a griddle or grill. Their weight and even heat distribution help create a perfect sear on the meat.

Advantages of cast iron presses include:
- Weight: Applies strong, even pressure for crispy crusts.
- Heat retention: Stays hot, helping cook the burger from the top.
- Durability: Lasts for years with proper care.
- Versatility: Can be used for bacon, sandwiches, and more.
Tips for using cast iron presses:
- Preheat the press on the griddle before use.
- Lightly oil the bottom to prevent sticking.
- Press the burger evenly but avoid pressing too long to keep juiciness.
- Clean and dry the press after use to prevent rust.
Cast iron presses are a favorite among grillers because they add flavor and texture. Their weight and heat help smash burgers perfectly every time.
Homemade Alternatives
Homemade tools can work well for smashing burgers if professional equipment is unavailable. Common household items can substitute and still give good results.
Some easy homemade alternatives include:
- Large metal spatula: Use the back side to press down the patty firmly.
- Heavy pan: A small cast iron or stainless steel pan can act as a press.
- Cookie cutter or lid: Use a flat lid or large cookie cutter to press evenly.
- Wooden cutting board: Place on top and press gently for a flat burger.

Precautions when using homemade tools:
- Make sure the tool is heat-safe and won’t melt or burn.
- Use clean items to avoid food contamination.
- Apply even pressure to prevent breaking the patty.
- Be careful with sharp edges or heavy objects.
Homemade alternatives are budget-friendly and can work well in a pinch. They let you enjoy smashed burgers without special gear.
Material Considerations
Understanding these material considerations helps pick a smash burger press that works best for your cooking style and griddle type. Good materials ensure the tool stays strong, safe to use at high temperatures, and easy to maintain. This section breaks down the key material features to think about before buying or using a burger smasher on your griddle.
Durability
Durability means how long the smashing tool lasts without breaking, bending, or losing shape. A durable tool saves money and effort because it does not need frequent replacement. Materials like stainless steel and heavy-duty aluminum are very durable. They resist dents, cracks, and rust over time. Wooden tools can be durable but may wear down faster if exposed to moisture and heat often.
- Stainless Steel: Strong, rust-resistant, and holds shape well.
- Cast Iron: Extremely sturdy but heavier and needs care to avoid rust.
- Aluminum: Lightweight with good strength but can scratch more easily.
- Wood: Gentle on griddles but less durable under heat and moisture.
- Silicone: Flexible and heat-resistant but not suitable for heavy smashing.
Here is a quick comparison of durability for common materials:
| Material | Durability Level | Comments |
| Stainless Steel | High | Resists rust and bending |
| Cast Iron | Very High | Lasts long but heavy |
| Aluminum | Medium | Lightweight but can dent |
| Wood | Medium-Low | Can warp or crack |
| Silicone | Low | Not for heavy smashing |
Heat Resistance
Heat resistance is crucial for tools that touch hot griddles. Materials that resist heat avoid melting, warping, or releasing harmful chemicals. Metals like stainless steel and cast iron handle very high heat without damage. Aluminum also resists heat but may transfer it quickly to the handle. Wooden handles stay cooler but the wood itself can burn if left on the griddle too long.
Silicone materials resist heat well but usually not suitable for pressing hard burgers because they are soft. Heat resistance helps keep the tool safe to hold and use during cooking.
- Stainless Steel: Withstands very high heat without damage.
- Cast Iron: Excellent heat resistance and holds heat evenly.
- Aluminum: Resists heat but can get hot quickly.
- Wood: Natural insulator but can scorch if exposed too long.
- Silicone: Heat resistant up to certain temperatures, not for heavy use.
Heat resistance levels for these materials:
| Material | Max Heat Resistance | Notes |
| Stainless Steel | Up to 1500°F (815°C) | Safe for high-temperature grilling |
| Cast Iron | Up to 1200°F (650°C) | Retains heat well |
| Aluminum | Up to 1220°F (660°C) | Quick heat transfer |
| Wood | Up to 400°F (204°C) | Can burn if overheated |
| Silicone | Up to 450°F (232°C) | Good for heat but soft |
Ease Of Cleaning
Cleaning the burger smashing tool quickly and easily keeps your kitchen tidy and safe. Materials that do not absorb grease or food particles make cleaning simple. Metals like stainless steel and aluminum usually clean easily with soap and water. Cast iron requires special care to maintain seasoning and avoid rust. Wooden tools can trap grease and need thorough drying.
Silicone tools often clean well and are dishwasher safe, but they may not be strong enough for heavy smashing. Smooth surfaces and fewer crevices help prevent food from sticking.
- Stainless Steel: Easy to clean and dishwasher safe.
- Aluminum: Cleans easily but can discolor over time.
- Cast Iron: Needs hand washing and drying to prevent rust.
- Wood: Requires gentle washing and drying to avoid cracks.
- Silicone: Dishwasher safe and non-stick but less durable.
Cleaning tips by material:
- Wash with warm soapy water immediately after use.
- Dry wooden tools thoroughly to prevent damage.
- Season cast iron regularly to maintain surface.
- Use non-abrasive sponges for metals to avoid scratches.
- Check if your tool is dishwasher safe before cleaning.
Tips For Effective Burger Smashing
Smashing burgers on a griddle requires more than just force. The right technique ensures juicy, flavorful patties with a crisp crust. Tips for effective burger smashing help create that perfect sear and texture. Understanding how to apply pressure, time the smash, and avoid sticking makes the process smooth and enjoyable.
Applying Even Pressure
Applying even pressure is key to shaping a burger that cooks evenly. Uneven pressure causes irregular thickness, leading to some parts overcooked and others undercooked. Use a flat, sturdy tool like a metal spatula or a specialized burger press to spread the meat evenly across the griddle.
Follow these tips for consistent pressure:
- Place the spatula directly above the patty’s center.
- Press down firmly but gently, avoiding too much force that squeezes out juices.
- Hold the press for 10 to 15 seconds to ensure the patty flattens evenly.
Avoid pressing multiple times; one solid press is enough. Repeated pressing can dry out the burger. Below is a quick comparison of pressure effects:
| Pressure Type | Effect on Burger |
| Even Pressure | Uniform thickness, even cooking, juicy texture |
| Uneven Pressure | Thin spots, uneven cooking, dry or undercooked areas |
Remember, the goal is to flatten the burger to about ⅓ inch thick for the best crust formation.
Timing The Smash
Timing matters when smashing burgers. Smash too early, and the meat sticks to the spatula. Smash too late, and the patty won’t spread properly. The ideal moment is right after placing the raw patty on the hot griddle.
Follow this step-by-step process:
- Preheat the griddle to medium-high heat.
- Place the burger ball on the griddle.
- Immediately press down with the spatula or press.
- Hold the press firmly for 10-15 seconds.
- Let the burger cook without pressing again.
Delaying the smash causes the burger to form a crust too soon, preventing proper spreading. Smashing early locks in flavor and helps create a crisp edge.
Use a timer or count seconds to keep consistent smash times. Here is a simple timing guide:
| Action | Time Frame | Reason |
| Place patty on griddle | 0 seconds | Start of cooking |
| Press burger down | Within 5 seconds | Ensures even spread |
| Hold pressure | 10-15 seconds | Creates thin, even patty |
Preventing Sticking
Sticking is a common problem when smashing burgers. Meat binds to the griddle surface, making flipping difficult and ruining the crust. Prevent sticking by preparing the griddle and patty correctly.
Try these tips:
- Preheat the griddle until very hot before adding the burger.
- Lightly oil the griddle with a high smoke point oil like canola or avocado oil.
- Use a non-stick spatula or a metal one with a thin edge for easy lifting.
- Avoid moving the burger too soon; wait 2-3 minutes to form a natural crust.
- Sprinkle a pinch of salt on the patty before smashing; salt helps create a barrier.
Here is a quick checklist to prevent sticking:
| Step | Action | Why It Helps |
| 1 | Preheat griddle | Prevents meat from cooling and sticking |
| 2 | Oil surface | Creates a non-stick barrier |
| 3 | Use proper spatula | Eases lifting and flipping |
| 4 | Wait before flipping | Forms crust that releases naturally |
Following these simple steps guarantees a smooth burger flipping experience and a perfect sear every time.
Maintaining Your Tools
Maintaining these tools keeps them working well and lasting longer. Proper care helps avoid rust, damage, and wear. This section explains simple ways to clean, store, and protect your smashing tools. Good maintenance saves money and keeps your kitchen safe and efficient.
Cleaning Techniques
Cleaning your burger smashing tools after every use is crucial. Grease, food bits, and moisture can cause buildup and rust. Follow these easy steps:
- Hand wash immediately: Use warm water and mild dish soap. Avoid harsh detergents that damage metal or wood.
- Use a soft sponge or brush: Gently scrub all surfaces to remove stuck food. Avoid steel wool on non-stick parts.
- Dry thoroughly: Use a clean towel to dry tools. Air drying can cause rust on metal parts.
- For cast iron tools: Avoid soap. Wipe with a damp cloth and season with oil to keep the surface non-stick.
Cleaning frequency and method depend on the tool’s material. Here is a quick guide:
| Tool Material | Cleaning Method | Notes |
| Stainless Steel | Warm soapy water, soft sponge | Dry immediately to avoid water spots |
| Cast Iron | Wipe with damp cloth, no soap | Season with oil after cleaning |
| Wooden Handles | Hand wash, avoid soaking | Dry quickly to prevent cracking |
Never put smashing tools in a dishwasher. The high heat and detergents can cause damage.
Storage Suggestions
Proper storage keeps your smashing tools in top condition. Store them where they stay dry and protected from damage. Here are tips for good storage:
- Use a dedicated drawer or container: Keep tools separate from heavy or sharp kitchen items.
- Hang metal tools: Use hooks or racks to air them out and avoid moisture buildup.
- Keep wooden handles away from direct sunlight: Prevents fading and cracking.
- Store cast iron tools with light oil coating: Stops rust during longer storage periods.
- Use protective covers or sleeves: Protect edges and surfaces from scratches.
Organizing tools well makes them easy to grab and reduces the risk of accidents. Below is a simple storage checklist:
- Clean and dry tools completely
- Apply oil to cast iron parts
- Place in dry, cool area
- Separate from heavy or sharp objects
- Use hanging racks or drawer dividers
Avoiding Damage
Damage to smashing tools can reduce their lifespan and performance. Handle tools carefully to avoid problems. Follow these guidelines:
- Don’t use metal spatulas on non-stick surfaces: Scratches ruin the coating.
- Avoid dropping or banging tools: Can cause dents or cracks.
- Don’t expose wooden handles to water for long: Leads to swelling and splits.
- Use tools only for smashing burgers: Avoid prying or cutting with them.
- Regularly check for loose handles or parts: Tighten screws or bolts promptly.
Protect your investment by avoiding harsh chemicals or abrasive materials during cleaning. Here is a quick damage prevention table:
| Common Damage | Cause | Prevention |
| Rust | Moisture left on metal parts | Dry tools, apply oil to cast iron |
| Scratches | Using metal on non-stick surfaces | Use plastic or wooden spatulas |
| Cracks in wood | Exposure to water or heat | Keep handles dry, avoid soaking |
| Loose handles | Wear and tear | Regularly tighten screws or bolts |
Frequently Asked Questions
What Tool Is Best For Smashing Burgers On A Griddle?
A heavy, flat spatula or a specialized burger press works best. It evenly flattens patties quickly. Metal spatulas provide firm pressure, ensuring a crispy crust.
Can I Use A Regular Spatula To Smash Burgers?
Yes, a sturdy metal spatula is ideal. It applies enough force to flatten the burger evenly. Avoid flimsy or plastic spatulas as they may bend or melt.
How Does A Burger Press Improve Smashing On Griddles?
A burger press ensures consistent thickness and shape. It creates even contact with the griddle, helping achieve a perfect sear. This tool simplifies smashing and speeds up cooking.
Is A Cast Iron Press Good For Smashing Burgers?
Yes, a cast iron press is excellent. Its weight helps create a crispy crust quickly. It also retains heat, enhancing the searing process on the griddle.
Conclusion
Choosing the right tool to smash burgers makes a big difference. A sturdy spatula or a special burger press works well. Press gently but firmly to get that perfect crust. Avoid using tools that scratch your griddle. Keep your tools clean and dry for best results.
This helps cook your burger evenly every time. Enjoy the simple joy of a well-made smashed burger. Try different tools to see what fits you best. Your griddle and burger deserve the best care.